Spring Cleaning? Why You Should Declutter These 3 Forgotten Spots First
Think your home’s clean? Think again. These 3 overlooked clutter zones are secretly making your space feel messy—and decluttering them first will instantly transform your home.
HOME STRUGGLES
Let’s be honest: have you ever spent an entire afternoon cleaning, only to look around and still feel like your home’s a little… off? You vacuum the floors, fluff the pillows, light your favorite candle—but somehow, the space doesn’t feel as fresh and tidy as you imagined. Sound familiar?
You’re not alone. We all fall into the same cleaning routine: wipe the counters, clear the dining table, fold the laundry, repeat. But here’s the secret no one tells you: the messiest parts of your home aren’t always the ones in plain sight. In fact, some of the biggest clutter culprits are quietly hiding in places you walk past every single day—and ignoring them could be why your space still feels chaotic, even after a full day of cleaning.
So here’s the million-dollar question: what if you’re cleaning the wrong spots first?
Think about it—when was the last time you tackled that “junk drawer” in the kitchen? Or sorted through the ever-growing pile on that random chair (yes, we all have one)? How often do you actually clean out what’s behind the bathroom mirror cabinet, or the baskets you stuffed full of “I’ll deal with this later” items last year?
Spring cleaning isn’t just about wiping surfaces—it’s about reclaiming those sneaky, clutter-filled corners that quietly steal your space and peace of mind. And the truth is, you don’t have to overhaul your entire house to feel a real difference. By focusing on just a few forgotten areas first, you’ll instantly make your home feel lighter, fresher, and way more put-together.
In this post, I’m sharing the three most commonly overlooked spots you should declutter before anything else. These aren’t the obvious ones you’ve probably already tackled—they’re the secret clutter magnets that silently weigh down your space. Decluttering them will kickstart your spring cleaning with instant results (and way less effort than you think).
Ready to stop wasting time on surface-level cleaning and finally tackle the clutter that actually matters? Let’s dive in.
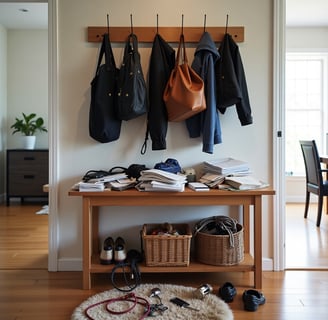
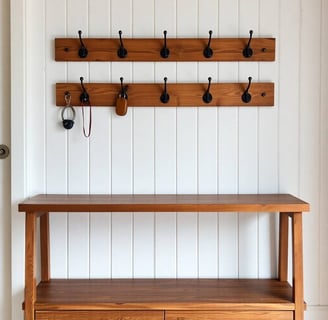
1. The “Invisible Pile” in Your Entryway
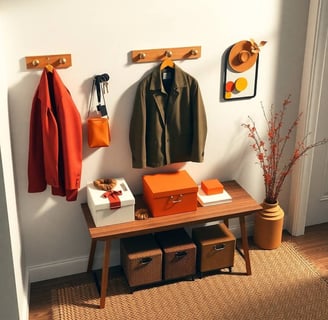
You know the one. It starts as a harmless spot—a basket for keys, a hook for bags, a small table for mail. Fast forward a few weeks, and suddenly it’s the drop zone for everything: unread letters, sunglasses, loose change, receipts, dog leashes, mystery cables…
Your entryway is the first thing you see when you walk in the door. If it’s cluttered, it immediately makes your entire home feel messy, no matter how clean the rest of it is. That’s why tackling this spot first creates an instant shift.
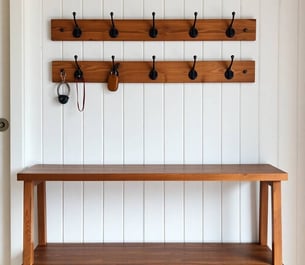
Pro tip: Try to keep only 5–7 items visible in your entryway. Less visible clutter = more mental clarity when you come home.
Imagine walking into a space that greets you with calm instead of chaos. That’s the power of decluttering this “invisible pile” first.
Final Thoughts: Why Starting Small Matters
By kicking off your spring cleaning with these three overlooked clutter zones, you’re doing more than just tidying up—you’re setting the stage for real, lasting change. These small but powerful wins create an immediate sense of accomplishment and visible progress, which fuels motivation to keep going.
It’s easy to get overwhelmed by the idea of decluttering an entire home, but focusing on these sneaky problem areas first lets you tackle clutter in manageable, bite-sized pieces. Instead of burnout, you build momentum.
Remember: decluttering isn’t about achieving a Pinterest-perfect space or keeping up with anyone else’s idea of “minimalism.” It’s about creating a home that feels:
lighter because it’s free from things you don’t use or love,
calmer because every item has a place,
and welcoming because you’re surrounded by what truly matters.
✨ Every cleared drawer, every reclaimed surface is a step toward that feeling of ease.
So, take a breath. Start small. Celebrate every little win along the way. You don’t need to do it all in one day—progress builds over time.

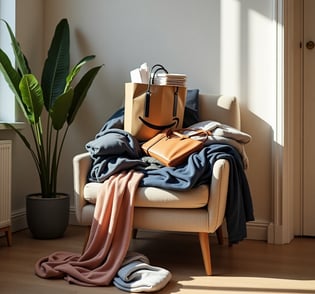
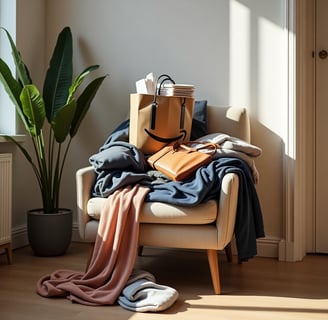
3. The “Laundry Chair” (or That One Surface That Collects Everything)
Ah yes… the chair. Or maybe for you, it’s a bench. A side table. A dresser top. Whatever form it takes, it’s that one surface in your home where stuff piles up: clean laundry waiting to be folded, clothes you might wear again, a purse you meant to unpack, Amazon packages you haven’t opened.
You tell yourself, “I’ll deal with it tomorrow.” But tomorrow turns into next week, and the pile keeps growing. And even though it’s just one spot, it visually clutters the entire room.
Introduction
Here’s how to declutter it like a pro:
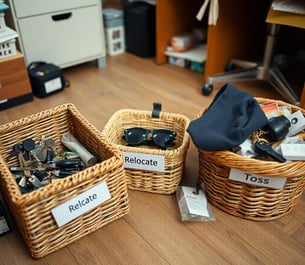
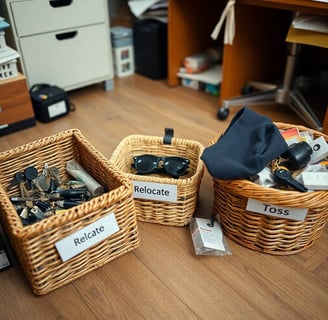
Empty everything out. Don’t just move things around—clear the table, the hooks, the baskets completely.
Create 3 piles: keep here, relocate, toss. Be brutal about what truly belongs by the door. (Spoiler: it’s probably not 12 pairs of sunglasses.)
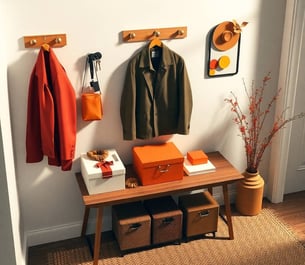
Add intentional storage: a small tray for daily essentials, a letter organizer for incoming mail, a hidden bin under a bench for shoes or bags.
STEP 1:
STEP 2:
STEP 3:
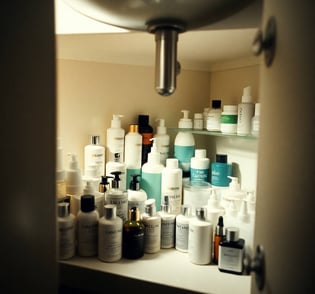
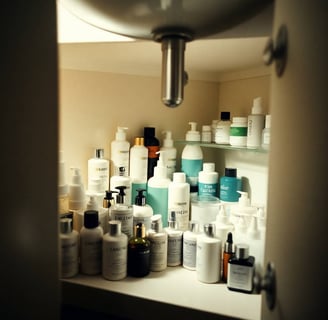
2. The Bathroom Product Graveyard (A.K.A. Under the Sink)
If you’ve ever had to dodge a falling bottle of half-used shampoo every time you reach under the sink, this one’s for you. The cabinet under the bathroom sink is a sneaky clutter magnet. It’s where half-empty lotions, expired skincare, forgotten hair products, and random hotel samples go to die.
The worst part? Every time you open it, you’re reminded of the mess—but it feels too overwhelming to tackle.
Here’s how to take control:
Completely clear out the space. Don’t just shuffle things around—remove everything from under the sink or inside the cabinet. Lay it all out on the floor or countertop so you can see what you’re dealing with. This gives you a clear starting point (and might shock you when you see how much has accumulated!).
Wipe down the cabinet inside and out. Use a disinfecting wipe or mild cleaner to remove dust, spills, and product residue. Consider adding a waterproof liner or shelf protector inside to prevent future leaks from ruining the base.
Inspect and purge. Go through each item one by one and ask:
Is it expired? Skincare and makeup products have a shelf life! Check dates or symbols (the little jar icon showing how many months it lasts once opened). Toss expired items—using them can irritate your skin.
Have I used this in the past 6–12 months? Be honest—if it’s been sitting untouched, it’s probably time to let it go. Exceptions: specialty treatments or emergency-use items.
Is it still in good condition? Dried-out nail polish? Hardened mascara? Empty bottles? Time to toss.
Sort into categories. Create groups so you can organize by purpose and frequency of use. Some helpful categories:
Daily skincare
Haircare products & tools
Dental care (toothpaste, floss, mouthwash)
Body care (lotions, razors, shaving cream)
Backup/extra stock
Cleaning supplies (bathroom cleaners, sponges)
Choose the right organizers.
Use clear plastic bins so you can see contents at a glance.
Try stackable drawers to create vertical storage if your cabinet has tall space.
Install a tension rod inside to hang spray bottles.
Add lazy Susans (turntables) for small bottles so nothing gets pushed to the back and forgotten.
Store intentionally. Put daily-use items in the front or easiest-to-reach bins, and less-used or backup products toward the back. Label your bins if needed to stay consistent.
✨ Pro tip: To maintain the organization, do a quick inventory every few months. Whenever you buy a new product, try following a “one in, one out” rule—if something comes in, something old should go out.
By organizing under your sink this way, you’re not just decluttering—you’re creating a system that saves time and stress every day. No more digging, no more forgotten products. Just a clean, functional space that works for you.
Here’s how to finally break the “laundry chair” cycle (for good):
Start by clearing the pile—completely.
Don’t just move things to a different surface. Commit to fully dealing with everything:Fold and put away clean laundry immediately into drawers and closets.
Sort dirty clothes straight into hampers or the laundry basket.
Hang clothes you plan to rewear back in your closet or on designated hooks.
Unpack bags or purses and put their contents back where they belong.
Every single item needs a real home, not a temporary spot on the chair. This resets the space.
Ask yourself: “Do I really need a chair here?”
Often, the reason clutter piles up is because a surface exists to catch it. Be honest:
Is the chair actually used for sitting?
Or has it become a glorified shelf?
If you never sit in it, consider removing it altogether! You might free up floor space and eliminate the temptation to pile things there again.
✅ Alternatives to a clutter-prone chair:
Replace it with a small storage bench that has a lid to hide items.
Add a closed cabinet or dresser to provide actual storage.
Place a large decorative plant or sculpture there—something beautiful but impractical for dumping stuff!
If you keep the chair, set clear boundaries.
It’s okay to keep the chair if it adds comfort or completes the room, but you need to prevent it from turning into a dumping zone again. Try this:Commit to no more than 1–2 intentional items allowed on the chair at any time. Example: a decorative throw and one accent pillow.
Use the chair as a staging area with a 24-hour rule: if anything lands on it (like folded laundry), it must be cleared by the end of the day.
✨ Pro tip: Turn the chair into a “styled moment” instead of a storage zone:
Drape a folded throw blanket and add a textured pillow to make it cozy.
Place a basket or magazine rack underneath to redirect clutter away from the seat.
Or top it with a folded quilt to subtly discourage piling other items on top.
Change the habit, not just the furniture.
Ask yourself: “Why do things end up here in the first place?” Is it because you don’t have a better spot for half-worn clothes? Or because laundry folding feels like an extra chore? Solving the root cause—by adding more hooks, hampers, or streamlined laundry routines—helps prevent the pile from reappearing.
By tackling the “laundry chair” intentionally, you’re not just cleaning a surface—you’re reclaiming both visual calm and a sense of order in your space.
✨ Imagine walking into your room without seeing a looming pile. That peace? Totally possible.